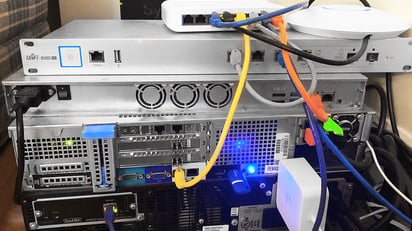
Home Lab
Creating a home lab with Cisco routers, switches, HP servers, Raspberry Pis, and laptops is an excellent networking project. Here's a step-by-step guide to set up your home lab, focusing on shared internet access, segmented communication, and security.


Overview of the Project
Networking Devices: Cisco routers and switches for routing and switching.
Servers: HP servers to provide centralized services (DNS, DHCP, file sharing, etc.).
Client Devices: 7 laptops and Raspberry Pis acting as clients or auxiliary servers.
Security: VLANs, ACLs, firewalls, and secure protocols to protect the network.
Step-by-Step Implementation
1. Hardware Setup
Networking Devices:
Connect the Cisco router to your ISP (for internet access).
Connect the router to a Cisco switch.
Connect laptops, Raspberry Pis, and HP servers to the switch.
Servers:
Install operating systems Windows Server on the HP servers.
Use these servers for services like DHCP, DNS, and file sharing.
Client Devices:
Set up Raspberry Pis with Raspberry Pi OS (Desktop) for lightweight functionality.
Connect laptops and Raspberry Pis to the network.
Network Design
IP Addressing:
Use private IP ranges (e.g., 192.168.1.0/24).
Assign static IPs to servers and networking devices.
Use DHCP for laptops and Raspberry Pis.
VLANs:
Segment the network for better management and security:
VLAN 10: Laptops
VLAN 20: Raspberry Pis
VLAN 30: HP Servers
VLAN 40: Management
Inter-VLAN Routing:
Enable inter-VLAN routing on the Cisco router for controlled communication between VLANs.
NAT and Internet Access:
Configure NAT on the router for shared internet access.
Cisco packet tracer
This project aims to develop a user-friendly mobile application that enhances productivity and organization. Through intuitive design and seamless functionality, users can efficiently manage tasks, set reminders, and collaborate with team members.
